To make proper git based workflows, one needs to learn both branching and tagging. While we have discussed git branches in depth in previous blog posts, we have avoided tags till now. Git tags are references that point to specific points in git history. Tagging is generally used to capture a point in the history that may be utilized in future to come back to. However, tags do not change from point, where they were created. So while branches move forward, tags do not. They represent static points in git history.
Some of the examples of tag might be like v0.1, v0.2 etc.
Create Tags
To create a new tag execute the following command:
git tag {tagname}
Replace {tagname} with a semantic identifier to the state of the repo at the time the tag is being created. A common pattern is to use version numbers like v0.1. Git supports two types of tags: lightweight and annotated.
A lightweighted tag is the minimal information. Previous example like v0.1, v0.1.1 etc are examples of the lightweighted tags. Lightweight tags are essentially bookmarks to a commit, they are just a name and a pointer to a commit, useful for creating quick links to relevant commits.
Annotated tags, however, are designed to store more information. They are stored as full objects in the Git database. They’re checksummed; contain the tagger name, email, and date; have a tagging message; and can be signed and verified with GNU Privacy Guard (GPG). It’s generally recommended that you create annotated tags so you can have all this information; but if you want a temporary tag or for some reason don’t want to keep the other information, lightweight tags are available too.
Create Lightweight Tags
Create lightweight tags are simple. One needs to just put tag name in front of git tag command:
git tag v0.1.1
Lightweight tags are created with the absence of the -a, -s, or -m options.
Create Annotated Tags
Creating an annotated tag in Git is simple. The easiest way is to specify -a when you run the tag command:
git tag -a v0.1.1
This will open up associated text editor so that you can supply relevant information, just like using git commit. However, we can supply some message using -m option and that would forgo opening of associated text editor:
git tag -a v0.1.1 -m "create my first annonated tag"
Listing Tags
To view the created tags in a git repo, one can just run the git tag command:

You will notice that when you call git tag, you do not get to see the contents of your annotations. To preview them you must add -n to your command:
git tag -n

To filter the list of tags the -l option can be passed with a wild card expression like:
git tag -l 'v1.1.*'
where * acts as a wildcard. Again, if you are using git on windows, use double-quotes instead of single-quotes in above command.
Tagging old commits
You can also tag commits after you’ve moved past them. By default, git tag will create a tag on the commit that HEAD is referencing. Alternatively git tag can be passed as a ref to a specific commit. This will tag the passed commit instead of defaulting to HEAD. Suppose, your git history looks like below:

We now want to add tag v0.2 to commit bcf9d58. For this, we can run below command:
git tag v0.2 bcf9d58
We can add options if we want to make it an annotated tag. Now, if we view our git history, it would look like below:

ReTagging/Replacing old tags
If you try to create a tag with the same identifier as an existing tag, Git will throw an error like:
fatal: tag ‘v0.1’ already exists

Additionally if you try to tag an older commit with an existing tag identifier, git will throw the same error.
In the event that you must update an existing tag, the -f FORCE option must be used.
git tag v0.1.1 -f bcf9d58

Executing the above command will map the bcf9d58 commit to the v0.1.1 tag identifier. It will override any existing content for the v0.1.1 tag.
Sharing: Pushing Tags to Remote
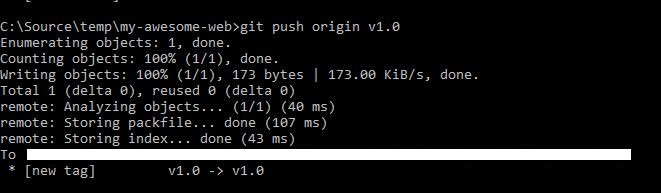
By default, the git push command doesn’t transfer tags to remote servers. You will have to explicitly push tags to a shared server after you have created them. This process is just like sharing remote branches — you can run:
git push
If you want to push multiple tags, you can use below command:
git push --tags
When another user clones or pulls the repo, they will receive the new tags.
Checking Out Tags
You can view the state of a repo at a tag by using the git checkout command followed by tagname like below:
git checkout v0.1.1
The above command will checkout the v0.1.1 tag. This puts the repo in a detached HEAD state. This means any changes made will not update the tag. They will create a new detached commit. This new detached commit will not be part of any branch and will only be reachable directly by the commits SHA hash. Therefore it is a best practice to create a new branch anytime you’re making changes in a detached HEAD state.
Thus, if you need to make changes — say you’re fixing a bug on an older version, for instance — you will generally want to create a branch:
git checkout -b version0.1.1 v0.1.1

Conflict between branch and tag name
It should be clear now that you should keep the branch name and tag names always separate. Consider below git history:

As you can see, v0.1 is the name of a branch as well as one of the tags. Let’s checkout v0.1 and see what happens:

As its clear, the default is to checkout a branch.
Deleting Tags
Deleting tags is a straightforward operation. Passing the -d option and a tag identifier to git tag will delete the identified tag:
git tag -d

Note that this does not remove the tag from any remote servers. In order to update any remotes, you must use:
git push :refs/tags/
