It has been long since I have written blog post about using Nuget Package feeds in VSTS, which can be found here. I have always wanted to write a follow up blog post about how to use feeds further but I was occupied by other priorities and then it fell off my mind. Since then VSTS has been renamed to Azure DevOps and Package feeds are now known as artifacts feeds. However, other than this, most of the things and functionality has been more or less intact in terms of this feature.
For this who are not aware of the Nuget, it is a technology which works on the principal of the package management and very helpful for code sharing in .NET framework and .NET Core based applications.
Since its inception, it has evolved to broader ecosystem and defines how packages for .NET are created, hosted, and consumed, and provides the tools for each of those roles. Because NuGet supports private hosts alongside the public nuget.org host, you can use NuGet packages to share code that’s exclusive to an organization or a work group. You can also use NuGet packages as a convenient way to factor your own code for use in nothing but your own projects. In short, a NuGet package is a shareable unit of code, but does not require nor imply any particular means of sharing.
What is needed to create Nuget Package
It can be said that a Nuget Package is just a ZIP file that has been renamed with the .nupkg extension and whose contents match certain conventions. Packaging begins with the compiled code (assemblies), symbols, and/or other files that you want to deliver as a package and determining if there are any dependencies.
This process is independent from compiling or otherwise generating the files that go into package, although you can draw from information in a project file to keep the compiled assemblies and packages in sync. The proper way to create nuget packages is nuget.exe and it can be obtained by installing Nuget CLI.
Also we need to keep in mind that any CI/CD tool like VSTS, Jenkins, Travis-CI does not contain nuget.exe, they need to call the same to prepare nuget packages. Besides nuget.exe, we need a nuget manifest file (.nuspec file) to supply information about nuget package.
The role and structure of the .nuspec file
Once you know what files you want to package, the next step is creating a package manifest in a .nuspec file. It is written in XML format.
The manifest:
1. Describes the package’s contents and is itself included in the package.
2. Drives both the creation of the package and instructs NuGet on how to install the package into a project. For example, the manifest identifies other package dependencies such that NuGet can also install those dependencies when the main package is installed.
3. Contains both required and optional properties as described below.
Some of the required properties are as below:
1. The package identifier, which must be unique across the gallery that hosts the package.
2. A specific version number in the form Major.Minor.Patch[-Suffix] where -Suffix identifies pre-release versions
3. The package title as it should appears on the host (like nuget.org)
4. Author and owner information.
5. A long description of the package.
Other useful but optional properties are:
1. Release notes
2. Copyright information
3. A short description for the Package Manager UI in Visual Studio
4. A locale ID
5. Home page and license URLs
6. An icon URL
7. Lists of dependencies and references
8. Tags that assist in gallery searches
Create .nuspec file for your application
Next step is to obviously to create the nuspec file for the project containing above mentioned required properties and may be some of the optional properties in to the Source code repo.
Below is the nuspec file that I have created:
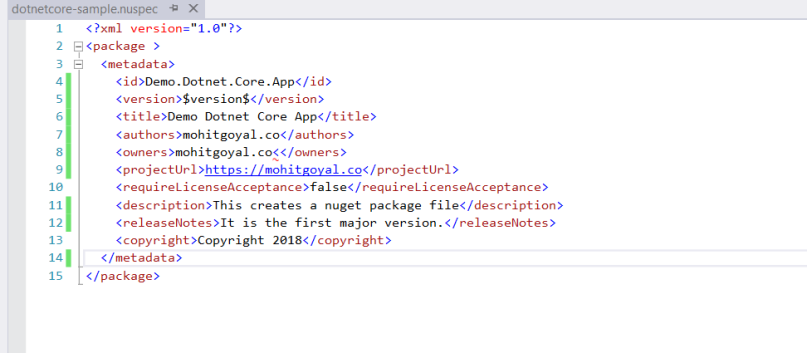
Note that we have left the version tag untouched. We need to modify it during build configuration.
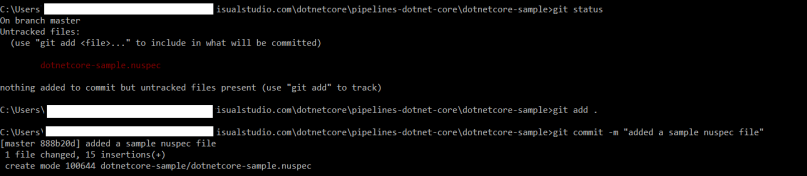
After this, commit and sync your source code to the source code hosting tools like Azure Repos, GitHub etc. For our purpose, we’ll push the file to the Azure Repo since our source code repository is located in the same.
Create Nuget Package Feed in Azure Artifacts (or use Existing)
You can choose to publish nuget package feed into one of the existing nuget feeds in the Azure Artifacts or you can choose to create new.
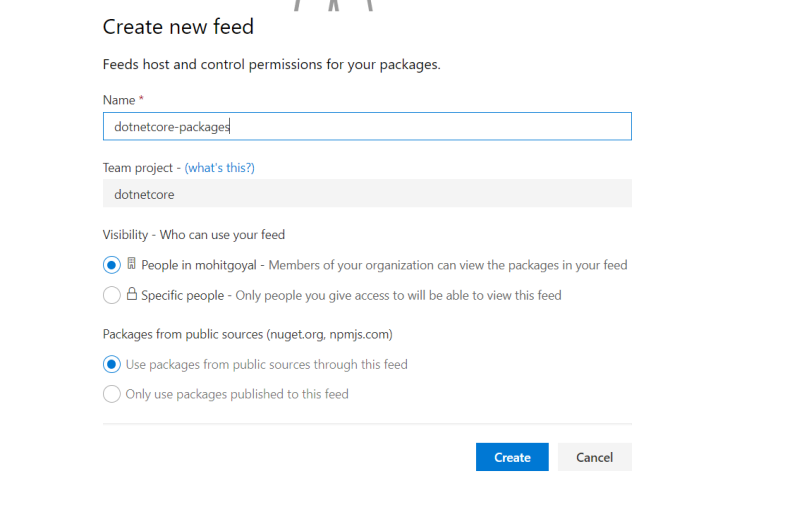
To create a new feed, go to Azure Artifacts and select new feed:

In the new page, provides basic details such as name and choose whether its public/private etc and then select create feed:
For our purpose, I’ll use one of the existing feeds. However I have included above steps to let you know the steps to create a new feed.
Create a continuous Build Pipeline
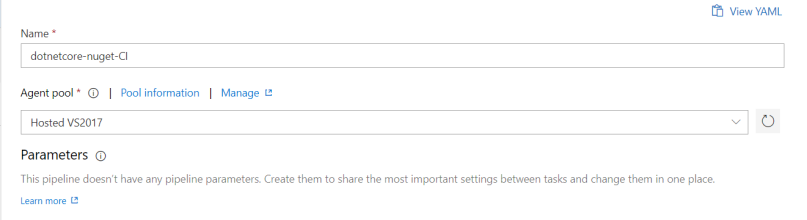
Before we package our application, it would be a good idea to make sure it works as intended. We first need to start with an empty job while creating new pipeline. Let’s select agent pool as ‘Hosted VS2017’ and provide a name for the pipeline:
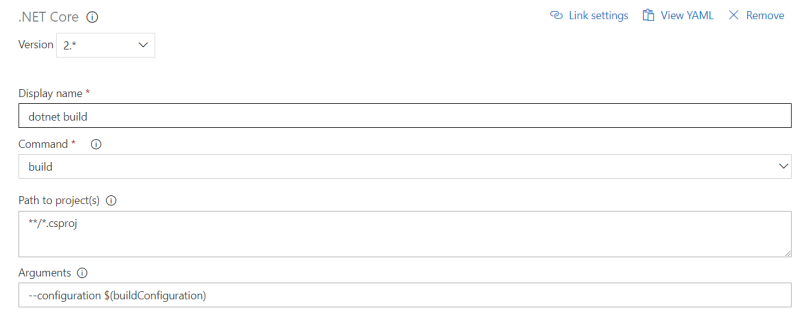
Since our Dockerfile is very bare, we’ll first need to add steps to build and publish .NET Core image. Let’s go to add tasks and add 3 tasks for .NET Core: Build, Test and Publish.
For the Build task, provide values as below:
For the Test task, provide values as below:

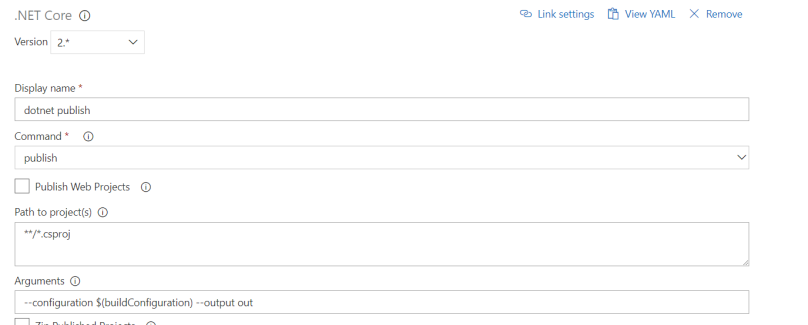
For the Publish task, provide values as below:
Next, we need to add Nuget task from list of tasks and configure it for creating package as below:
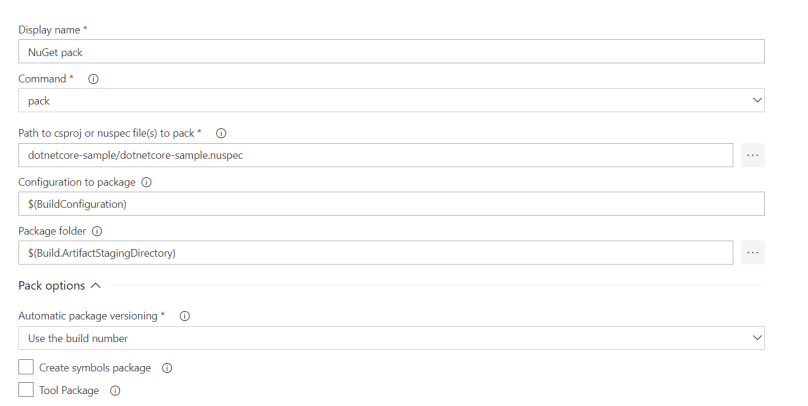
Note that we have chosen to provide nuget package version based on the build number. You can choose the version number of your choice. However we need to keep in mind that version number needs to adhere to format X.Y.Z or X.Y.Z.A where X,Y,Z,A are positive integers.
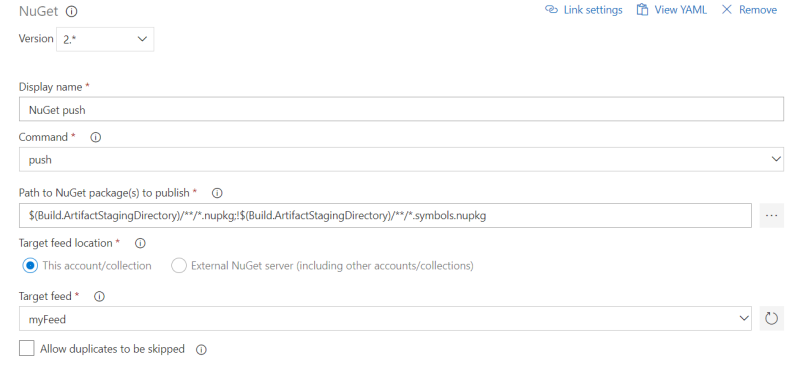
finally, we need to add Nuget task again to publish the package created in the above step. We can configure it like below:
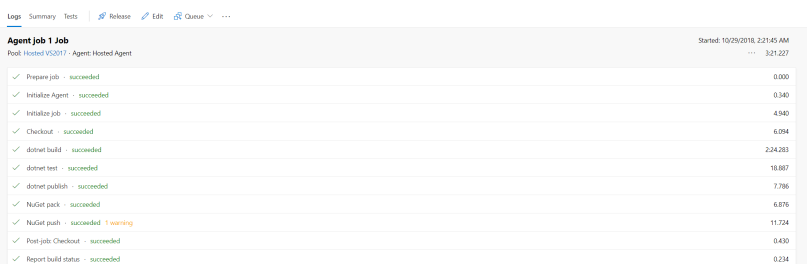
Verify the build configuration
Once we have configured the build, let’s go ahead and create a build. Upon completion, we should see a success message like below:
We can also go and check the package feed in Azure Artifacts to make sure that nuget package is created:
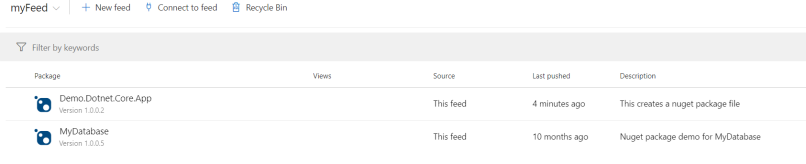
There it is!
Do note that even though we have used .NET Core to generate Nuget Package, .NET Core has in-built command for it. This built-in command can be run like:
dotnet pack
More on this command can be learned here.

Very helpfull! Thanks for sharing.
LikeLike
Great !!
Thanks for post and regards from Argentina.
LikeLike
Great powershell script. Do you have one that can read out the AssemblyInformationalVersion “semVer” numbers that are already in the file, and simply output them to existing pipeline variables?
LikeLike