This is the final post in the series of basics for working on Infrastructure as a Code or IaaC. For first two posts, please refer below two links:
- Code virtual network configuration in Azure using ARM templates, Visual Studio and Git
- Sync local source code and commit history with Visual Studio Team Services
We learned how to create ARM template inside Visual Studio, enable versioning, deploy ARM template using Visual Studio, make new configuration changes, sync source and commit history to VSTS. In this blog post, we’ll learn how to create a CI/CD pipeline to deploy ARM templates.
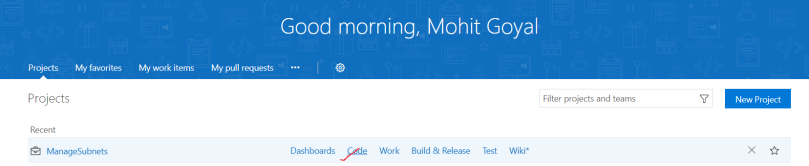
First, we need to login to VSTS subscription account with the proper credentials. It will take to the VSTS Dashboard by default which will show the projects created. If you hover over the name of the project, it will show links like code, test etc. From there we need to select code for the project we created earlier:
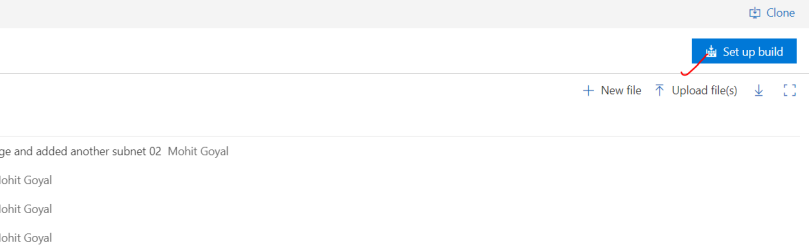
It will take us to the repositories for the project. Now we need to select ‘Set up Build’ from the right top side on the user interface:
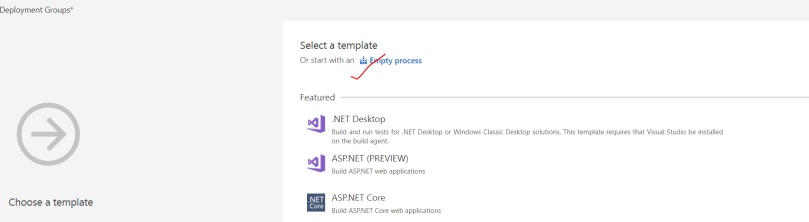
From the new page shown, we’ll select the ’empty process’ link so that there are no tasks pre-configured for us:
Since we have selected ‘Setup build’ from repository, vSTS will configure some settings directly for the build definition. In the next page, it will ask which agent to use, where-in we’ll use ‘hosted agent’ from list of options shown:
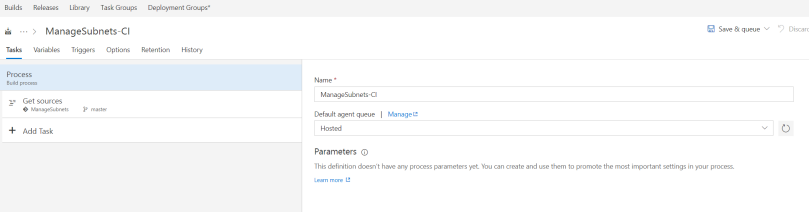
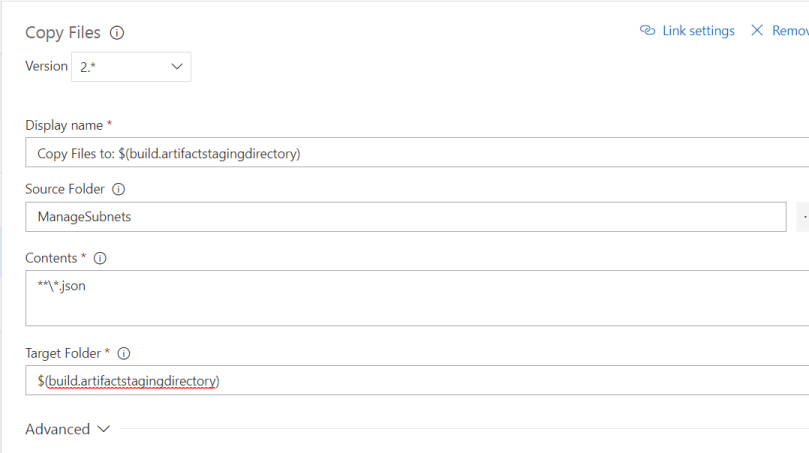
In very simple terms, a hosted agent is a pre-configured server which is used to compile the source code to generate artifacts and is provided by Microsoft. Now, we need to first add a task so that we can generate the artifacts. So, we need to click add tasks from left pane and then search for ‘copy task’:

We need to modify it as below so that it can copy json files from the code repo:
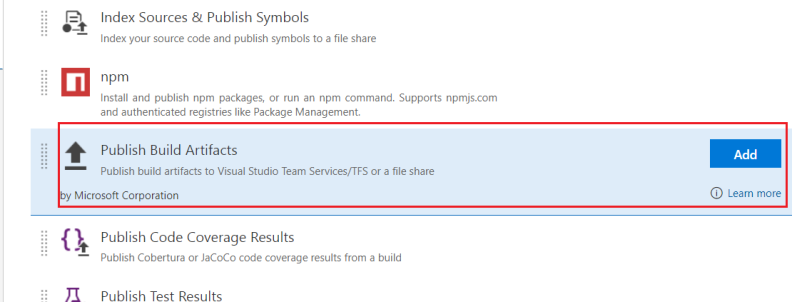
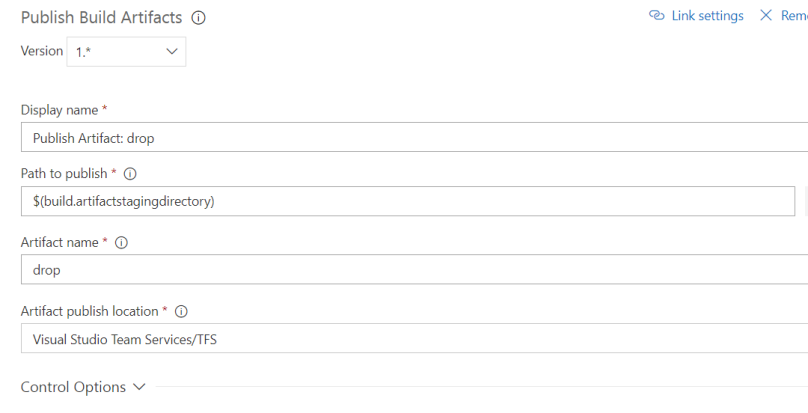
We now need to copy the artifacts generated on hosted agent to VSTS back. For this purpose, we need to add a task to build definition. Again, click add task from left pane, search for ‘Publish’ and then add the ‘Publish Build Artifacts’ task:
Once its done, we’ll modify it to look like below:
We now have a ready build definition for CI purposes. We can choose to add triggers where-in we can select one or more branches to be checked, modify the build definition name, use some variables etc. For the purpose of simplicity and this blog post, we’ll not go more in details.
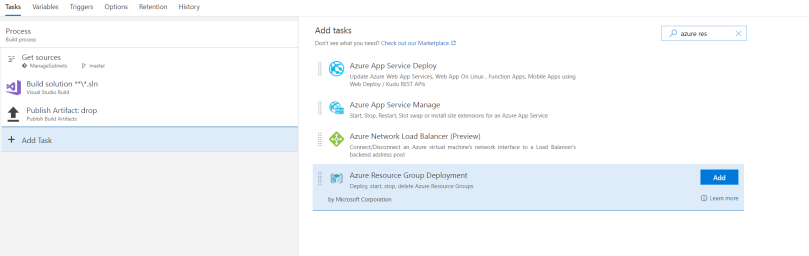
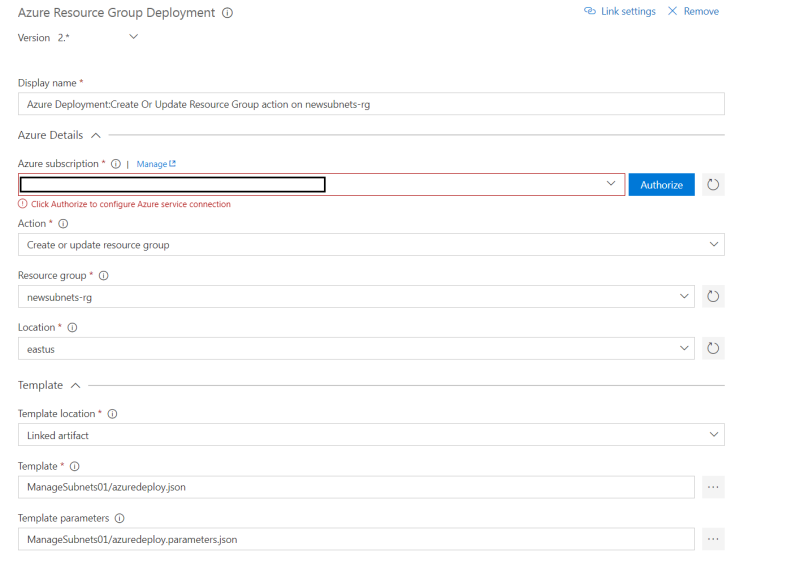
Now, we need to deploy the resources on Azure. The general guideline is to create a release definition, link it to build and then create a CD pipeline. For purpose of simplicity, we’ll directly add a release task in the same build definition that we created above. For this, select add task from left pane and search for ‘Azure Resource Group Deployment’ task:
Once its added, we’ll need to provide Azure related details like name of subscription, resource group name and location. We’ll also need to provide the azure template location. You’ll need to provide respective details for your environment for same. Below is a sample from my details:
Now, we’ll select ‘Save and Queue’ from right pane and then Queue a new build:
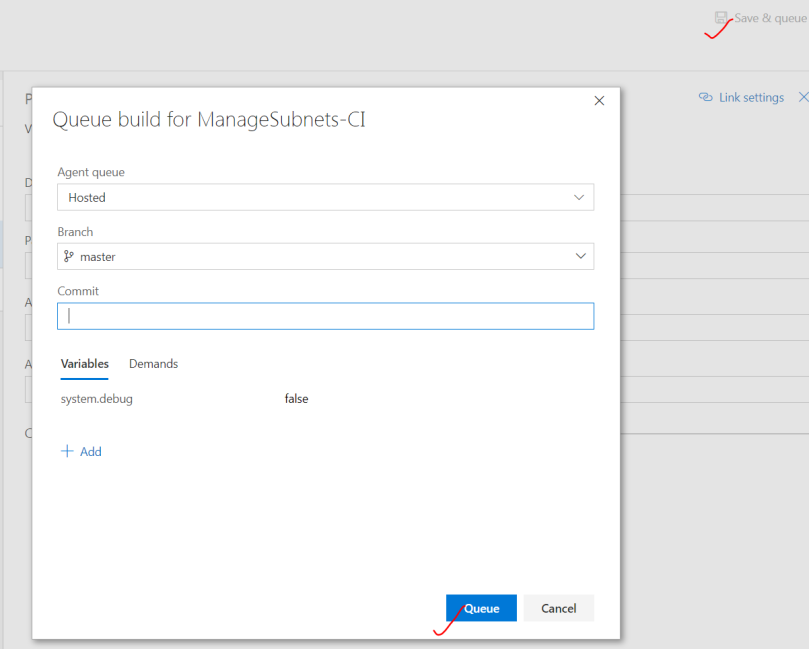
Once its complete, we can see the resources deployed into the Azure Portal.
One of the philosophies of the IaaC is to modify configuration at the source rather than at destination. So as we have learned, for modifying configuration, we need to modify at the source, check-in new code and then build & deploy using the CI/CD definition.

the MSBuild is only for .net applicaitons
LikeLiked by 1 person
Hi Kay..that’s right. I’ll update blog post. Thanks for bringing this to my attention. Gracias.
LikeLike
Hi Mohit I am trying to deploy 4 ARM templates using Azure CLI script means instead of choosing Azure Resource Deployment I am choosing Azure Cli as the task and running the command 4 times. In this scenario how i can create the release ci/cd pipeline?
LikeLike
Hi Sourav. You can use the Azure CLI task available in the marketplace.
https://docs.microsoft.com/en-us/vsts/pipelines/tasks/deploy/azure-cli?view=vsts
Or you can write a batch file to do this. It’s up to you.
LikeLike
How do you deploy ARM templates in different environments in CD pipeline.
LikeLike
Hi Nanda…you can use the same task ‘Azure Resource Group Deployment’ in release pipelines. Or you can also use PowerShell cmdlet New-AzureRMResourceGroupDeployment for this.
LikeLike