Azure web apps is one of popular offerings of Azure Platform as a Service (PaaS). It has now become part of Azure App Service and also known as Azure App Service Web Apps. Azure Web Apps enables you to build and host web applications in the programming language of your choice without managing infrastructure. It offers auto-scaling and high availability, supports both Windows and Linux, and enables automated deployments from GitHub, Visual Studio Team Services, or any Git repo.
Kudu is one of the advanced online tools for viewing files in the Azure Portal. However, Kudu does not let you view files or upload new files with some modified content. Generally, you would make changes inside your code and publish to Azure which all works seamlessly. However, some time it is just too much work to modify a couple of lines in the one of the files or if you want to make sure that content uploaded is proper or not, you cannot do it. For this, you need to use FTP to upload/download files. In this blog post, we’ll cover steps required to upload/download files from Azure Web Apps via FTP.
For this, first we need to select Web App in Azure Portal and then select overview. Then we need to download publish profile:

This will download a publishsettings file to your machine which is basically a xml file. Then we need to open inside editor of our choice. You should see something like this (I have formatted output a little bit so that it can be easily understand):
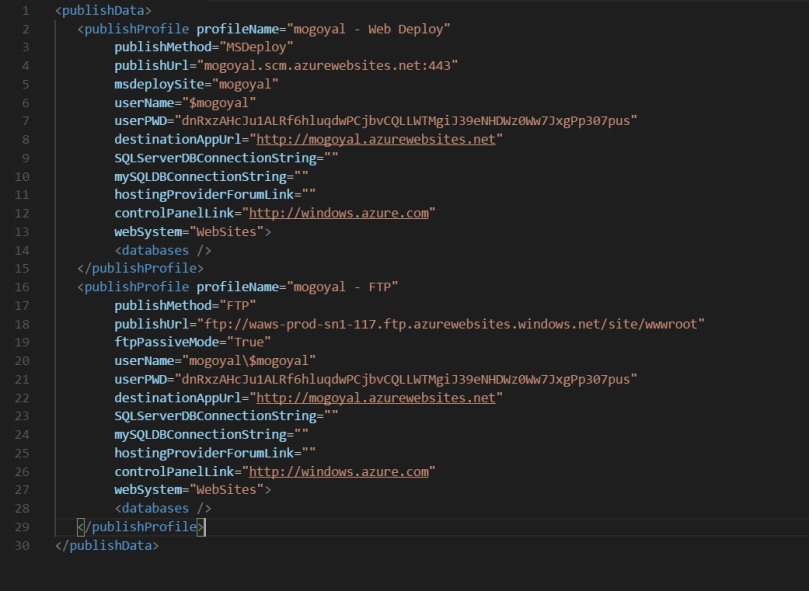
As you can see, it contains two tags, out of which one is for webdeploy and one is for FTP. We would need to note the values from publishurl tag, username and password. For publishUrl value, we would only be interested in hostname which in our case would be waws-prod-sn1-117.ftp.azurewebsites.windows.net.
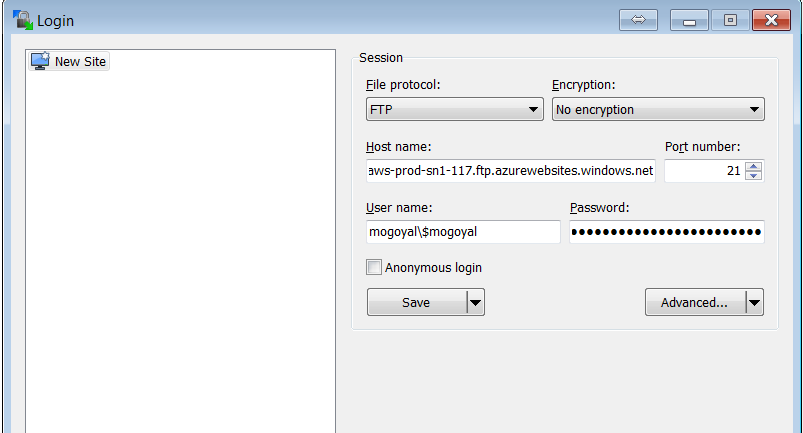
Now, we would use FileZilla or any other FTP client of our choice to use these values to connect to site. For this post’s purposes, we would be using WinScp, which is one of the free open-source utilities.
Be sure to select protocol as FTP only:
After connection, you would be able to see the default directory contents as below:

We would need to navigate to site and then wwwroot to see the contents and then we can easily upload/download files.

[…] 7. Connect to Azure Web App via FTP to upload/download files … […]
LikeLike